You will need the following to make these beauties:

Supplies:
· Merry & Bright MT-MBR-09 paper sheet: Mintay Papers
· Water color paper
· 20cm Red and White Twine
· 20cm green ribbon (5mm)
· Little Birdie Crafts Rouge Fairy Dust
· Watercolor paint – Turquoise
· Distress Ink pad, Iced Spruce
· Fine Glue Pen for Fairy Dust: Quickie glue
· Penelope Dee Star Stencil
· Nuvo Glimmer
· Tombow Glue
· Sisal
· Foam-tape squares and cardboard to raise elements
Tools:
· Paper cutter / guillotine
· Small scissors for fussy cutting
· Go Cut and Emboss (Couture Creations)
· X-Cut “With Love” Die
· Paint brush
· Spatula
· Craft mat
· Craft Heat Tool

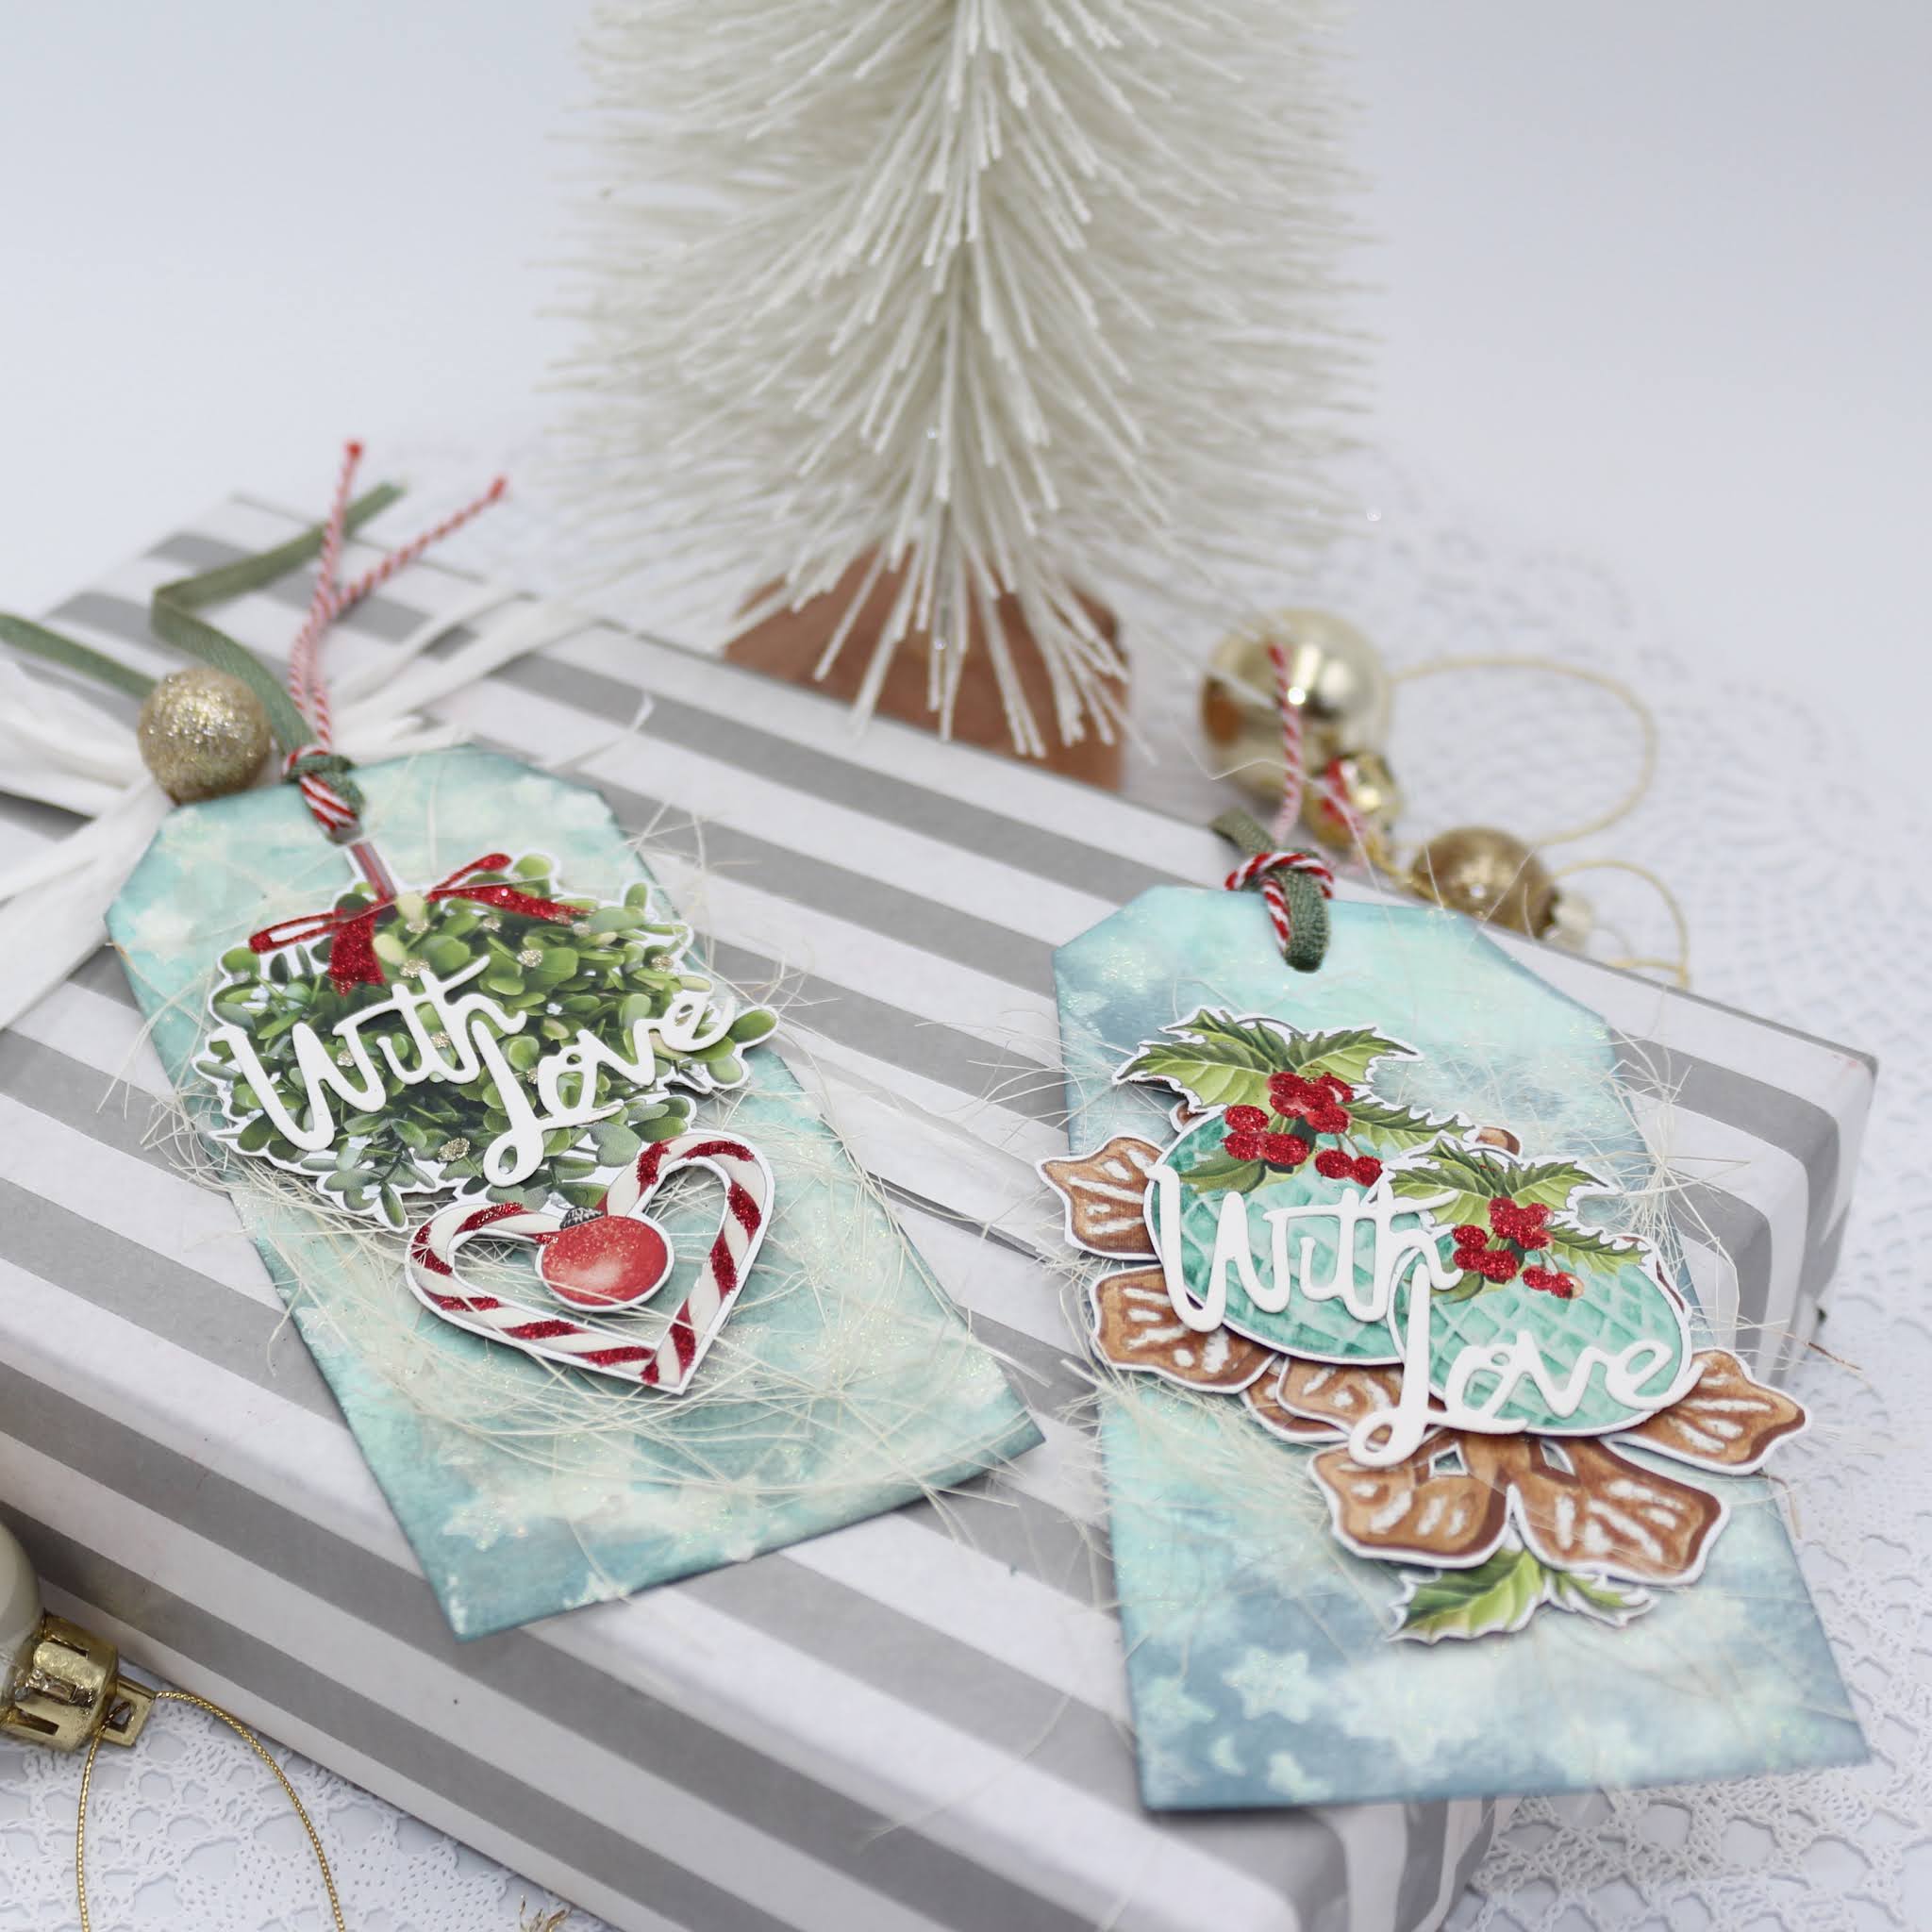
Step 1
Cut the tags from the watercolor paper, measuring 6cm x 13cm.
Trim the two top corners and punch a hole for the ribbon and twine

Step 2
Paint the tag with different shades of turquois watercolor paint.
Chalk (Color) the edges with the Distress Ink and add some randomly on the tag.

Step 3
Stencil stars over the entire tag with the Nuvo Glimmer. Leave to Dry.

Step 4
Die cut the words “With Love” from some off-cut watercolor paper.

Step 5
Select some elements from the embellishment sheet and fussy cut about 1mm from the edge, leaving a small white edge around the element.

Step 6
Apply fairy dust to strategic areas on the elements, use the glue pen. Work on a piece of paper, that way the access Fairy Dust is collected and can be put back in the container and is not wasted.

Step 7
Finally adhere everything to the tag, layering the elements with the sisal at the bottom. Raise some elements with foam tape. To finish off, tie the twine and ribbon through the hole and you’re done! fast and unique, perfect for that special gift.
I also created Christmas cards in a similar way, have a look:

More close-up photos:


(Also available on the PNA Blog)
Thank you for stopping by, I hope you found some inspiration today!
Merry Christmas!
Ezmé


